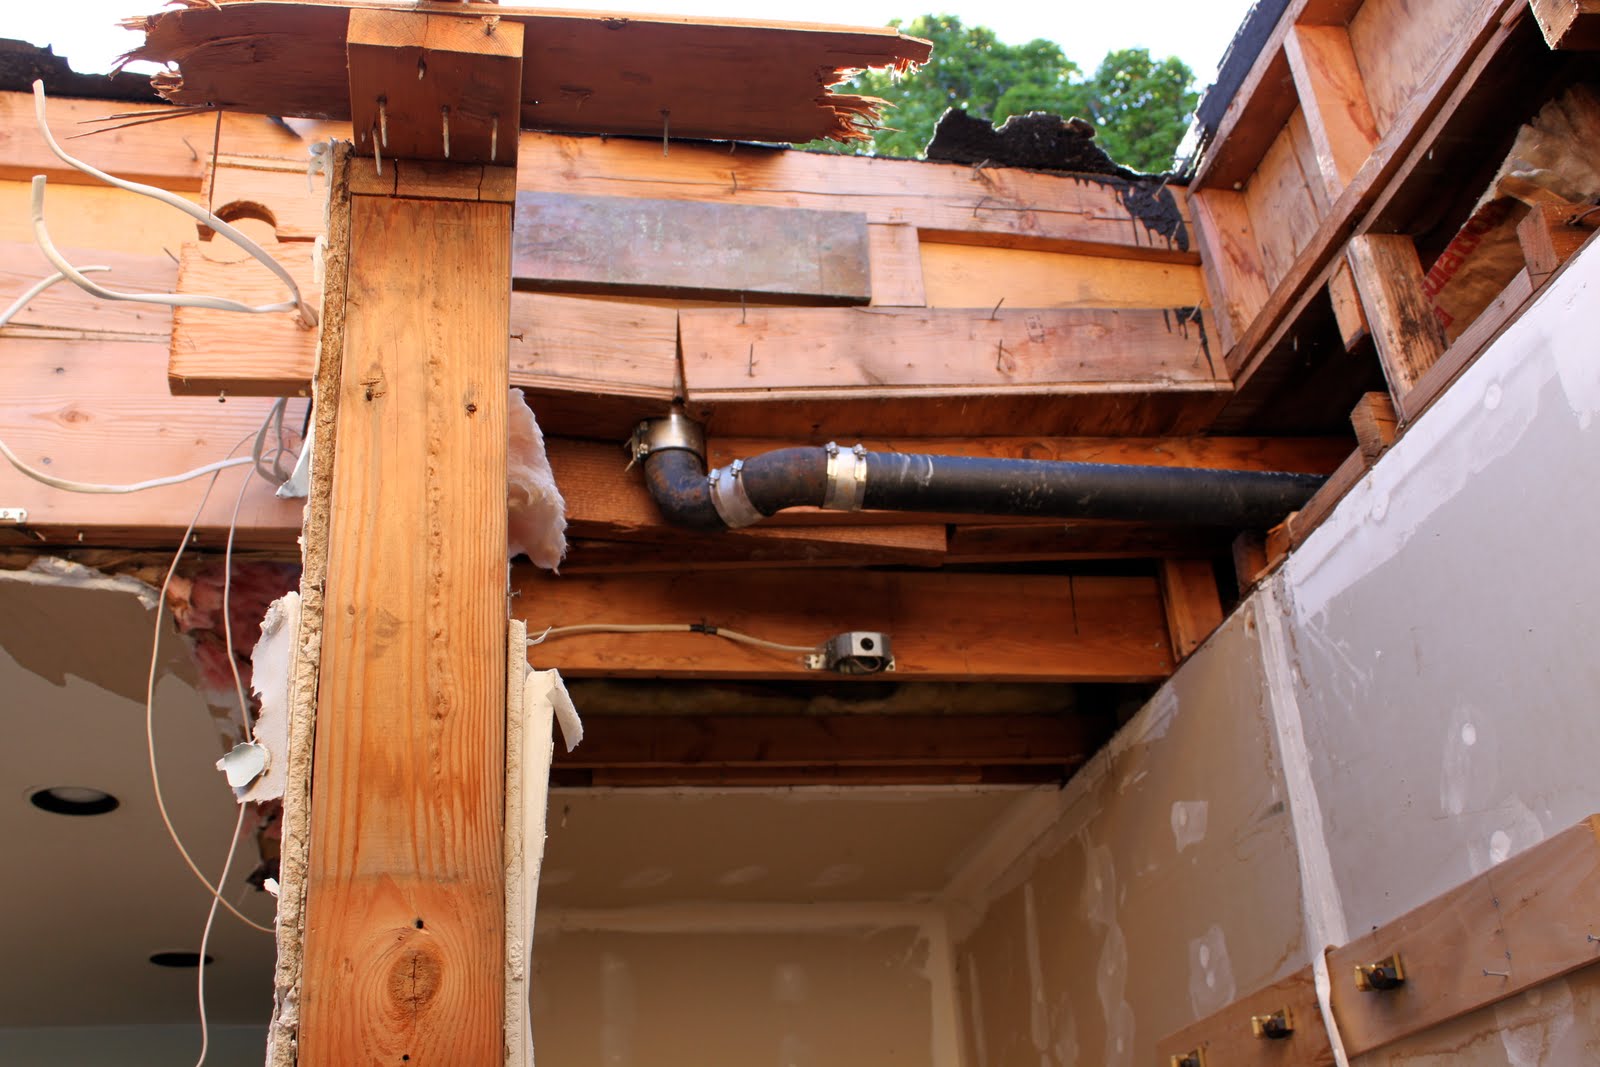
The guys who put up the sheetrock (who are different from the guys that mud and tape the sheetrock) are here, and we want them to put up new sheetrock in the middle bedroom (Molly's bedroom). The contractors wanted about $1000 to demo the room, plus more money to add one new receptacle and do the insulation. Being cheap, Jake and I spent the entire weekend, including Father's Day, taking out all the plaster and lathe on the walls and ceiling, rewiring the entire room, including a new box for ceiling light and 4 new ceiling cans (since it is so dark in there) and putting in insulation. It was a long weekend, but Molly's room is going to be awesome now, with all new wiring and new sheetrock. In the top picture you can see the walls we demoed, including the closet, which will eventually be part of the bathroom. In the bottom picture you can see one of the new can lights we put in. We finished just in time -- the sheetrock guys started the ceiling today.
Monday, June 21, 2010
Happy Father's Day, Jake
The guys who put up the sheetrock (who are different from the guys that mud and tape the sheetrock) are here, and we want them to put up new sheetrock in the middle bedroom (Molly's bedroom). The contractors wanted about $1000 to demo the room, plus more money to add one new receptacle and do the insulation. Being cheap, Jake and I spent the entire weekend, including Father's Day, taking out all the plaster and lathe on the walls and ceiling, rewiring the entire room, including a new box for ceiling light and 4 new ceiling cans (since it is so dark in there) and putting in insulation. It was a long weekend, but Molly's room is going to be awesome now, with all new wiring and new sheetrock. In the top picture you can see the walls we demoed, including the closet, which will eventually be part of the bathroom. In the bottom picture you can see one of the new can lights we put in. We finished just in time -- the sheetrock guys started the ceiling today.
Tuesday, June 15, 2010
Low Voltage Guy
Jake has been spending every available minute over the last two weeks running low voltage throughout the house. He has been running orange smurf tube everywhere, so that we can have a central location for all the low voltage stuff. Our friend Bruce, who did the same thing (on a larger scale) in his remodeled house helped Jake lay out the plan, lent him his awesome Hole Hawg, the must have tool for drilling large holes through thick sections of wood, and spent some time helping him drill and run the tubing. Jake has also been running speaker wire everywhere, even in the new master bathroom, so that we can have in wall speakers and some great music in the house.
We decided to put the central low voltage location on a shelf above the stairs going down to the basement. It is centrally located with a drop ceiling, making it a good choice to hold all the electronics. In the picture right above, you can see all the smurf tube terminating above the stairs. Those runs go to the TV wall in the family room, the desk in the master hallway, the master bedroom and the pantry. We also ran a line to Molly's new closet, just in case. There is also a tube to get low voltage out to the casita.
As for the speakers and tv, Jake spent time putting in blocking for the tv and blocked out some of the stud bays to provide the right size holes for the speakers. In the top picture, you can see Jake cutting studs to make the hole for the center channel over the tv. Don't worry about the wall -- the whole section is supported by a huge header!
Monday, May 31, 2010
Five Trades at Once
Framers, stucco guys, trenchers, electricians and roofers, oh my! We had another rain delay two weeks ago, since everyone needed to wait for the roof to go on and we couldn't do that in the rain. It has finally dried out a little, and the roofers have replaced the entire roof -- not just the part over the new section. Of course, it couldn't be simple. If you go back to look at the pictures of the casita, you will see that there is a metal cap over the parapet edge of the roof. While that look is okay for the new building, we really wanted the house to keep the same look, which means that we need to wrap the parapets in stucco. I'm sure none of you will be surprised to learn that the stucco method is way more expensive and labor intensive, but we really didn't want to change the look of the house. The good news is that the new roof is supposed to last for up to 30 years, so we won't need to do all this again any time soon.
In this picture you can see the roof material coming over the edge of the paper that will be under the stucco.
Once the roofers had made some progress, everyone else got into the act. The electricians have started to get things set for the new power in the back -- rather than try to run everything all the way through the old part of the house to the old main panel, they have set up a subpanel that will handle all the circuits for the new part of the house at the top of the steps to the basement. In all ways that really matter, the new panel will become the main panel, since it will have all the circuits for the kitchen, family room and back bedroom on it. The old panel will just have a few circuits left on it.
The stucco guys came and started to wrap the house in preparation for the stucco. It is taking them longer than it would, since they have to do extra work on the parapets. The paper on the side of the house goes up to the top of the parapet, and the roofing material wraps up and over the parapet. Then the stucco guys put another layer over the parapet that seals any nail holes, and then wrap the parapet in heavy duty metal lathe that isn't nailed in on the top -- only on the sides. It was really hot on Friday while they were up there wrapping everything.
To make things easier for the stucco guys, the framers had to come through and add about 3 inches to the height of the parapets all the way around. The extra height gives the stucco guys enough room to put a weep edge in to keep everything dry. Nothing like doing a roof the most time consuming, labor intensive, expensive way!
The trenching guys have also started. As many of you know, one of the main results we need from this house is a totally revamped waste system for the house, including a new connection to the street. We were hoping to be able to run the new sewer line straight down the driveway and into the street, but if we abandon the other connection, we need to seal it off under the street. It is far too expensive to dig up the street twice, so we will need to connect the sewer line in the same place, which means running it diagonally across the front yard. At least we will be able to avoid the big tree that is currently strangling our sewer line that way. Of course, any part of the yard that was still in its original condition, and there wasn't very much of it, will now be completely destroyed, since the trench will run from the casita in the back yard all the way down the driveway and across the front yard. In the picture at the top of the blog you can see the trench where it starts in front of the casita.
The one constructive thing the trenchers did for us is finally move the dogwood into the hole that Jake dug for it. As you can see in the picture below, it is still alive! We need to keep watering it, now that it is so hot.
Sunday, May 9, 2010
The Strongest Porch in the West (Maybe in the World)
Dan and Fernie, the framers, worked for about a week to complete the front porch. It took a little longer than they anticipated since they had to spend a day reframing the front wall around the front door. Because of the earthquake code, the walls of the porch have to be treated like shear walls, and so they are composed of Simpson strong walls and big beams. Looking around at all the porches around us, I can't help but wonder why we seem to be the only ones with this super strong porch, but with the sheathing on it looks really great.
The pictures below show the evolution of the porch as it moves from a simple concrete pad to a finished porch. In the first one, you can see all the rotten wood around the front door. In the second one you can see the new plywood that covers up the new framing they had to do to make the front wall strong again. I think the arches came out beautifully. The last picture is from the inside of the porch and shows the strength of the framing.


In other news, I started painting the garage and casita. I primed all day on Friday and got the garage itself done, but still need to do the front room and all the trim. In the picture below you can see the primed walls in the garage. We bought paint for the front room and the garage this weekend and I hope to be finished painting within a week and a half.
The pictures below show the evolution of the porch as it moves from a simple concrete pad to a finished porch. In the first one, you can see all the rotten wood around the front door. In the second one you can see the new plywood that covers up the new framing they had to do to make the front wall strong again. I think the arches came out beautifully. The last picture is from the inside of the porch and shows the strength of the framing.
In other news, I started painting the garage and casita. I primed all day on Friday and got the garage itself done, but still need to do the front room and all the trim. In the picture below you can see the primed walls in the garage. We bought paint for the front room and the garage this weekend and I hope to be finished painting within a week and a half.
Wednesday, May 5, 2010
Replacement Windows and Dry Rot
Since the windows in the two original bedrooms were not energy efficient, not to egress code, and broken, we decided to replace them. We switched from double hung windows to casement windows, so now both windows meet the fire code. All three big windows on the north wall match, because we also put a casement window in our bathroom in the back. In the picture below, you can see the girls standing next to the new window in what will be Molly's room. Notice that both girls are wearing their Big Bear Run t-shirts -- the whole family ran a 5K the day before this picture was taken. As an aside, both girls did great! Molly and Jake were only about a minute behind Emily and me.
When Dan and Fernie opened the wall around the front door in preparation for attaching the new front porch, they were met with an ugly surprise. We must have had a leak up in the top of the parapet, because the framing on both sides of the door is really rotten. It also looks like there is some old termite damage. Dan thinks the right side (when facing the door) is okay, but the left side needs to be replaced. Of course, the left side has plaster and lath on the inside (in our old bedroom), so if it gets messed up during the replacement of the framing it will be a huge pain to patch. In the picture below you can see the back of the plaster and lath and the mess that is that corner of the front of the house. The picture at the top gives a close up shot of how bad some of the framing is.
We are definitely going to get the framers to fix it as well as they can -- we would really prefer not to have the house held together by paint and caulk -- but it means more time for the framers and more money for us! The only good news is that the sill is still okay.
Saturday, May 1, 2010
More Framing -- Almost Done
The framers have been hard at work all week doing all the clean up kinds of things. They finished the roof so now the old section and new section of roof are finally connected and there is no big hole in the middle of the kitchen -- just in time for the rain to have stopped (hopefully). They installed the last two back windows and the doors, so the back wall of the house looks really good. The picture below shows the outside view of the family room with five windows and the picture above shows back wall of the master bedroom, with a sliding door and two windows next to it.
They also rebuilt the stairs going down into the basement, so now there is a nice landing right inside the door. They also framed in the rest of the pantry. The reason for the box inside the pantry is to provide headroom for going down the stairs into the basement. The shower in the master bathroom has been framed as well.
They also started on the last big interior thing -- the wall between the dining room and the kitchen. We are moving the door and making the small arch into a five foot wide arch that is centered on the big arch from the living room and the dining room. In the picture below you can see the small arch and right next to it is the new big opening. Right now it is rectangular, but soon it will be an arch. The other nice thing is that the framers took down the extra framing that made the wall between the kitchen and the dining room double thick, and now the two arches will match perfectly.
The view in the picture below is really neat. I took the picture standing right outside the back door of the family room. When we are done, you will be able to stand right inside the front door and see all the way through the house into the back yard.
Tuesday, April 27, 2010
The Kitchen Wall is Moved But the Rain is Back!
Yesterday, before the rains came again, the framers finished moving the north wall in the kitchen. It was a complicated process. First, Adrian the plumber needed to come and move the roof drain to the other side. You can see the rerouted drain in the picture below. The drain needed to be moved anyway, since if we left it where it was, it would come out right over the new big window in the kitchen wall.
Then, Dan, Fernie and Casey needed to build a temporary wall both above and below the floor to support the ceiling. They removed the wall and cut the ceiling joists so that they could slide the new beam up into the ceiling. When they opened the wall between the kitchen and the dining room to put in the post that will hold up the beam, they were met with an unwelcome surprise. The flue for the furnace and hot water heater travels through the wall exactly where they wanted to put the post. Rather than even think about moving the flue, they build a new wall on the outside of the old wall, making it three studs thick now. You can see the flue in the wall in the picture right below. In the picture below that, you can see the temporary bracing and how they cut the path for the beam.
After attaching the beam, they built the new wall closer to the basement stairs. The wall takes a jog inward after the pantry. The door to the stairs is no longer in the north wall but around the corner. This is a huge improvement, because now you don't need to turn 90 degrees to go down the steps right after opening the door. Instead, you will be able to open the door and walk straight down the steps. The first picture below shows the framed opening for the door down to the basement. In the second picture, the girls are standing in the doorway of the pantry. The long wall next to them will have the banquette on it.
It seems like a lot of time and money to spend to get an extra 6 inches or so in the kitchen, but without that space the design would not work. I am very attached to the banquette idea, and we need the extra width to make having the banquette feasible. I know it will all be worth it in the end!
Subscribe to:
Posts (Atom)